A step-by-step guide to assigning a local domain via DuckDNS and securing it with a valid Let’s Encrypt certificate, using Nginx Proxy Manager (NPM) as your reverse proxy (Everything in local).
Prerequisites
- Docker installed (Iam using portainer for container management)
- A DuckDNS account (free)
Why Add a Custom Domain & SSL?
Before diving in, I always like to clarify one question before starting anything. Which is the question Why?
let’s answer the simple but crucial question: Why set up a custom domain and valid SSL for services you’ll only access on your LAN?
Memorable URLs
jellyfin.akash.duckdns.orgvs.192.168.1.32:8096—a friendly name sticks in your brain far better than an IP:port combo.
OAuth & Secure Integrations
- Some of my service rely on OAuth/OpenID Connect for SSO or mobile-app login flows, which require HTTPS endpoints to function.
Browser “Secure Context” Features
- Web Push Notifications, Geolocation, and advanced PWA capabilities are only available under HTTPS.
Encryption In Transit
Even on a closed network, SSL/TLS prevents any local “sniffing” or man-in-the-middle attacks if your network is ever compromised.
Keeps credentials, tokens, and personal data encrypted between your client and server.
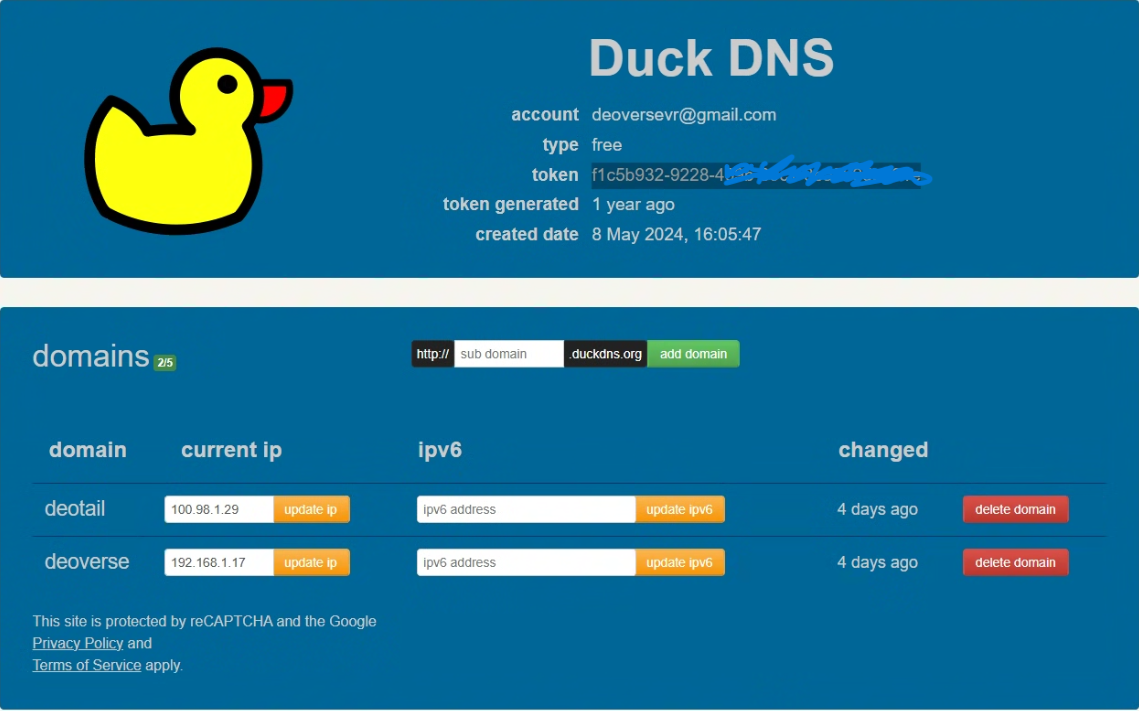
1. Register a DuckDNS Domain
Visit DuckDNS.org and log in or register
Under “Domains”, enter your desired subdomain and click Add Domain.
paste the host machine’s local IP address and hit update.
Copy your token (API key) for later.
2. Install Nginix Proxy Manager
Since iam using portainer, go to the stacks menu, and paste this docker compose file.
version: '3'

services:
  npm:
    image: 'jc21/nginx-proxy-manager:latest'
    container_name: nginx-proxy-manager
    restart: unless-stopped
    ports:
      - '80:80'        # HTTP
      - '81:81'        # NPM Admin UI
      - '443:443'      # HTTPS
    environment:
      DB_SQLITE_FILE: "/data/database.sqlite"
    volumes:
      - npm-data:/data
      - npm-letsencrypt:/etc/letsencrypt

volumes:
  npm-data:
  npm-letsencrypt:
3. Launch the Stack
Wait for all containers to start.
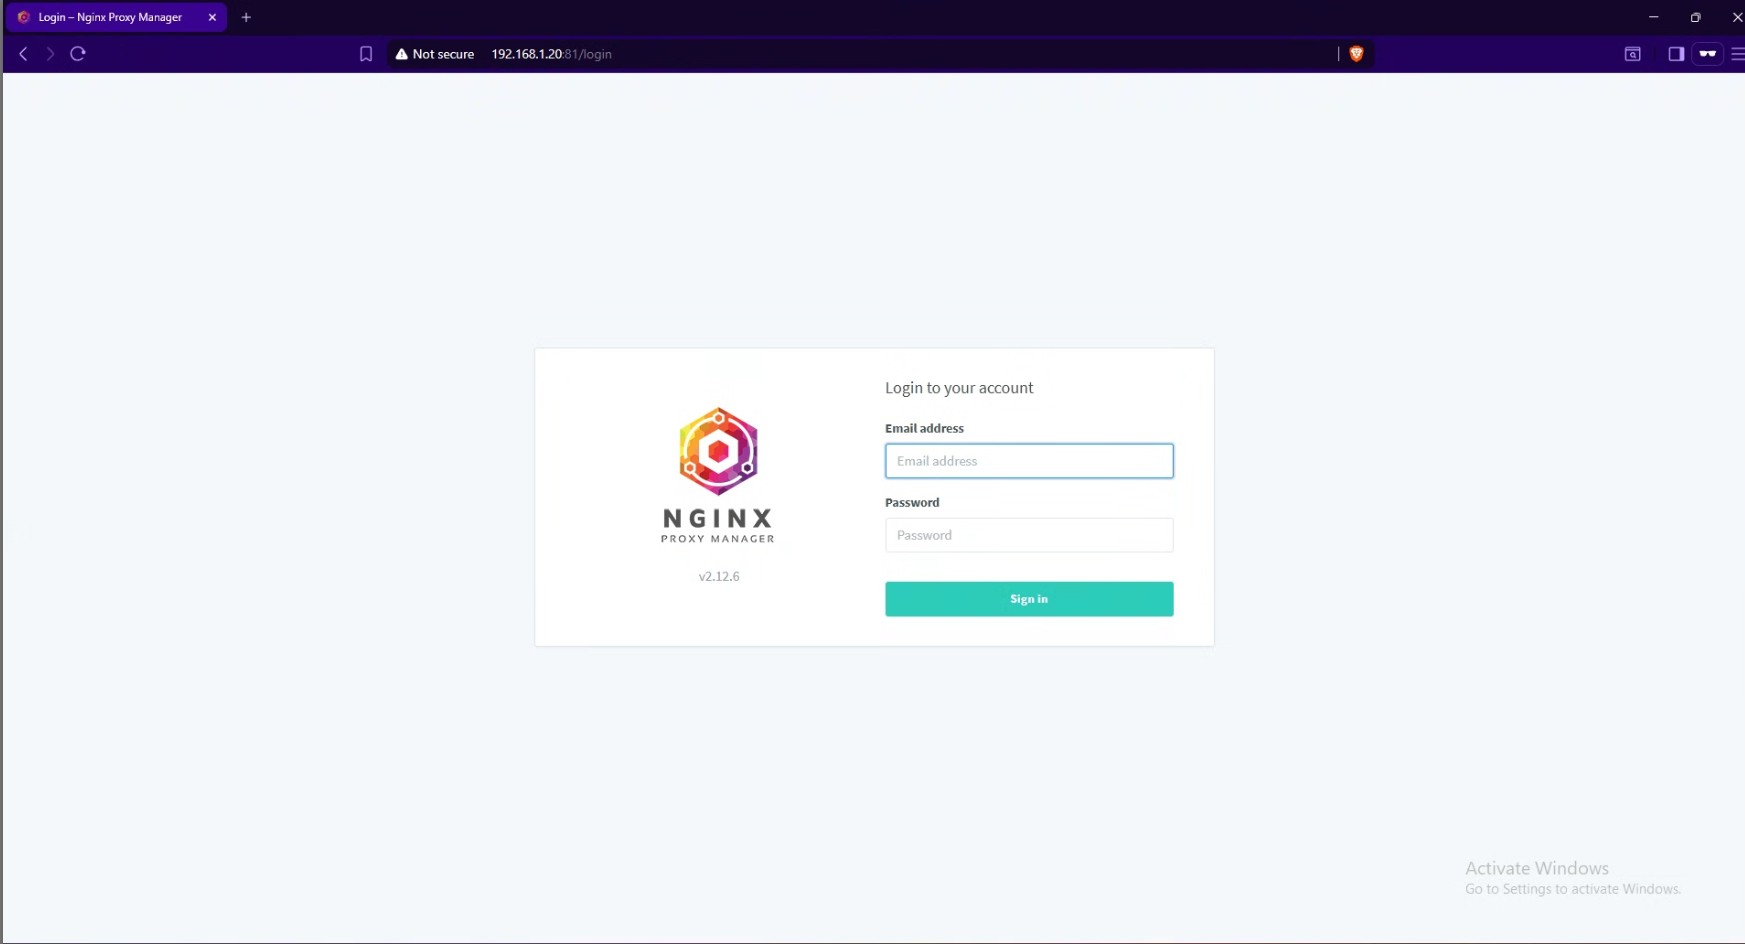
Access NPM UI at
http://<SERVER_IP>:81Default email address: [email protected]
Default password: changeme
After successful login you will be prompted to set the new password.
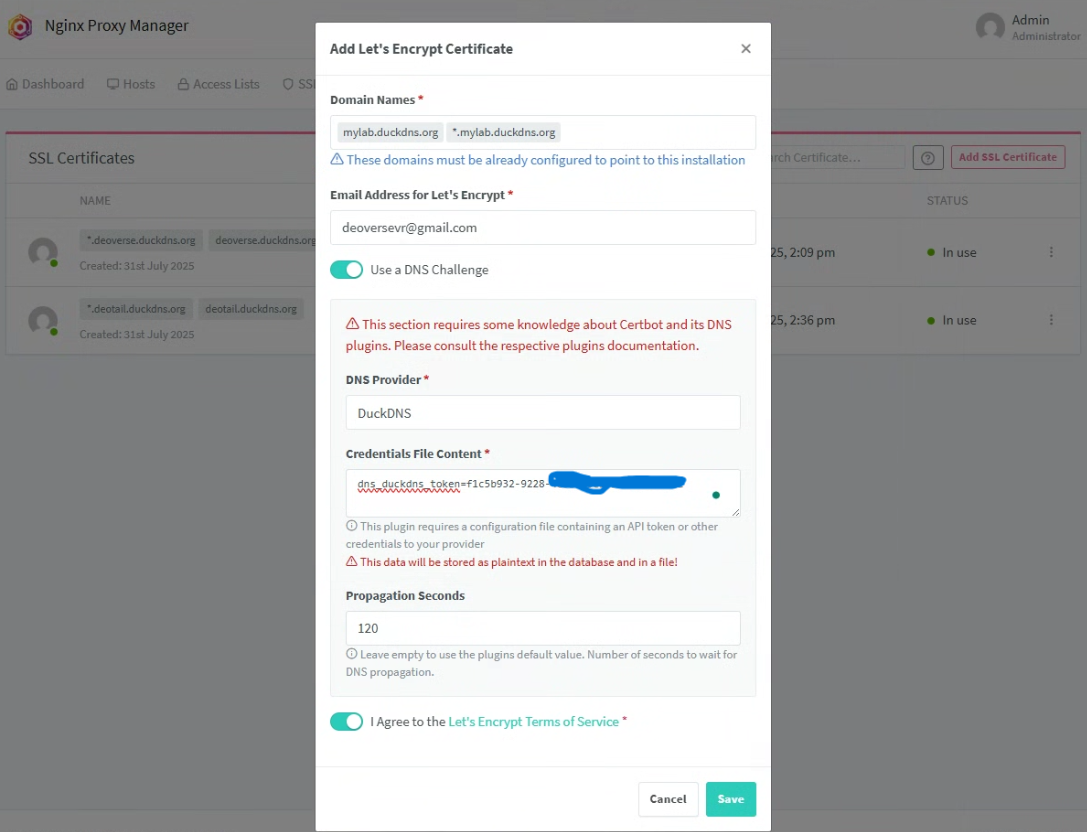
4. Generate Let’s Encrypt Certificate
In NPM UI → SSL Certificates → Add SSL Certificate.
Enter:
Domain Names:
mylab.duckdns.org*.mylab.duckdns.org(wildcard for all subdomains)
Provider: DNS Challenge → DuckDNS
API Token: paste your DuckDNS token
Propagation Seconds:
120
Agree to TOS and Save.
make sure that you add *. before your domain like *.mylab.duckdns.org to make sure that the npm will issue ssl for each subdomains.
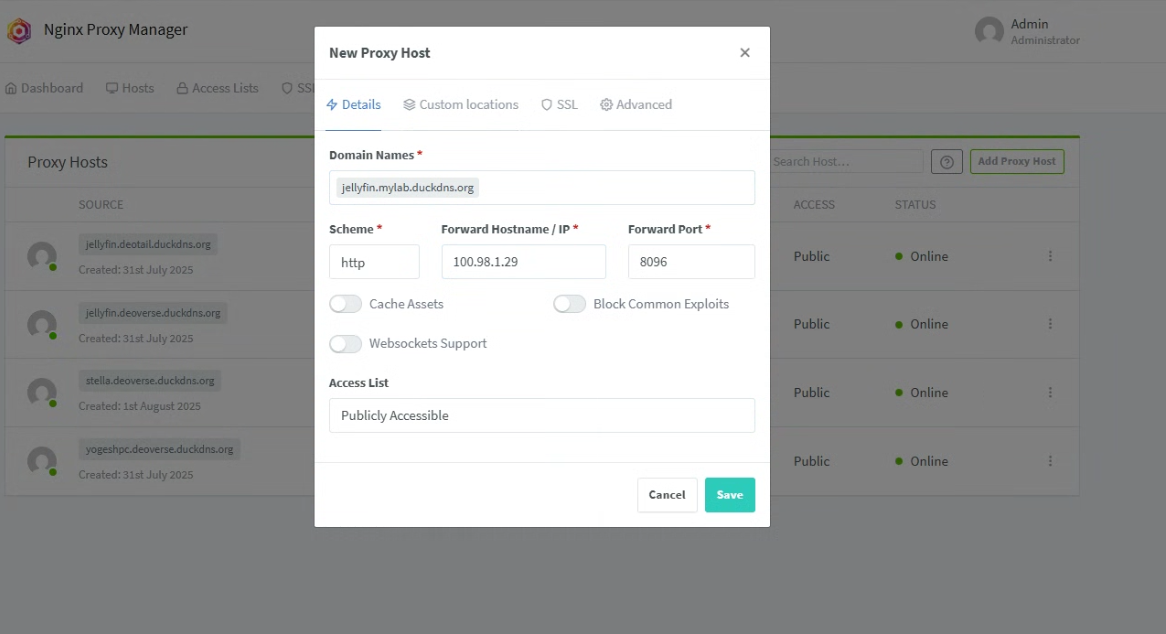
5. Add Proxy Hosts
For each service (e.g., Jellyfin, Nextcloud, Home Assistant):
In NPM UI → Hosts → Proxy Hosts → Add Proxy Host
Domain Names:
jellyfin.mylab.duckdns.org
Scheme:
http(orhttpsif your container serves TLS)Forward Hostname/IP:
jellyfin(the Docker container name) or just use ip address, or you can also provide the ip of the another system in your local network which is running the service.Forward Port:
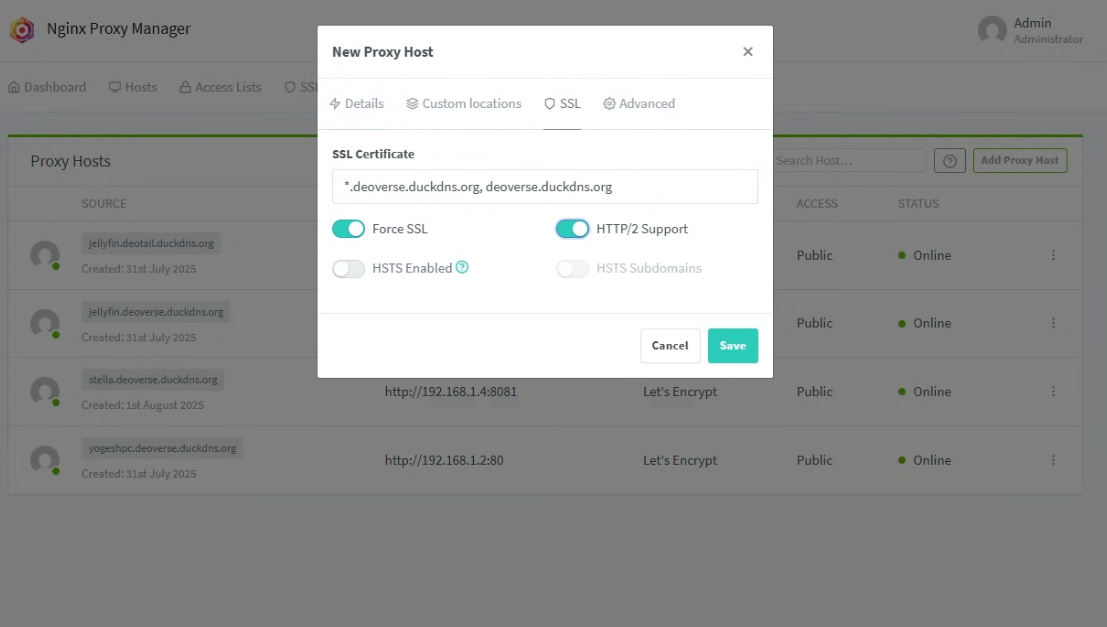
8096(Jellyfin default) or any port of your serviceSSL tab:
Select your DuckDNS wildcard certificate
✔️ Force SSL
✔️ HTTP/2 Support
Click Save.
Repeat for each app:
| Service | Subdomain | Scheme | Port | Container Name |
|---|---|---|---|---|
| Jellyfin | jellyfin.mylab.duckdns.org | http | 8096 | jellyfin |
| Nextcloud | nextcloud.mylab.duckdns.org | http | 80/443 | nextcloud |
| Home Assistant | homeassistant.mylab.duckdns.org | http | 8123 | homeassistant |