Dream Walker — VR Walk-in-Place Controller
Open-source VR locomotion device for SteamVR-compatible apps and games.
This document is a step-by-step user guide and SOP for installing the driver, creating controller bindings, programming/flashing the ESP32-C3 transmitter/receiver pair, connecting the device to a PC, and a connection diagram. Use this as the canonical README / user manual for contributors and end users.
Download the files here : Drive link
Quick overview
DreamWalker emulates a simple keyboard joystick (pressing W when you walk-in-place) and joystick/trackpad axes so VR games that read controller inputs work with the device. The hardware is two ESP32-C3 modules (transmitter + receiver) that communicate over ESPNOW. the receiver enumerates as a standard keyboard device on Windows and sends the W key on detected steps. SteamVR sees a virtual controller provided by the DreamWalker SteamVR driver.
Driver SOP (install & verify)
Windows / SteamVR driver install
Close Steam and SteamVR.
Copy the
dreamwalkerdriver folder into:C:\Program Files (x86)\Steam\steamapps\common\SteamVR\driversStart Steam, then start SteamVR.
Connect your headset (Oculus/Meta, Valve Index, or other) and ensure SteamVR is running.
Verify the driver is loaded in SteamVR
Open SteamVR →
Settings.
Go to
Controllers→Test Controllers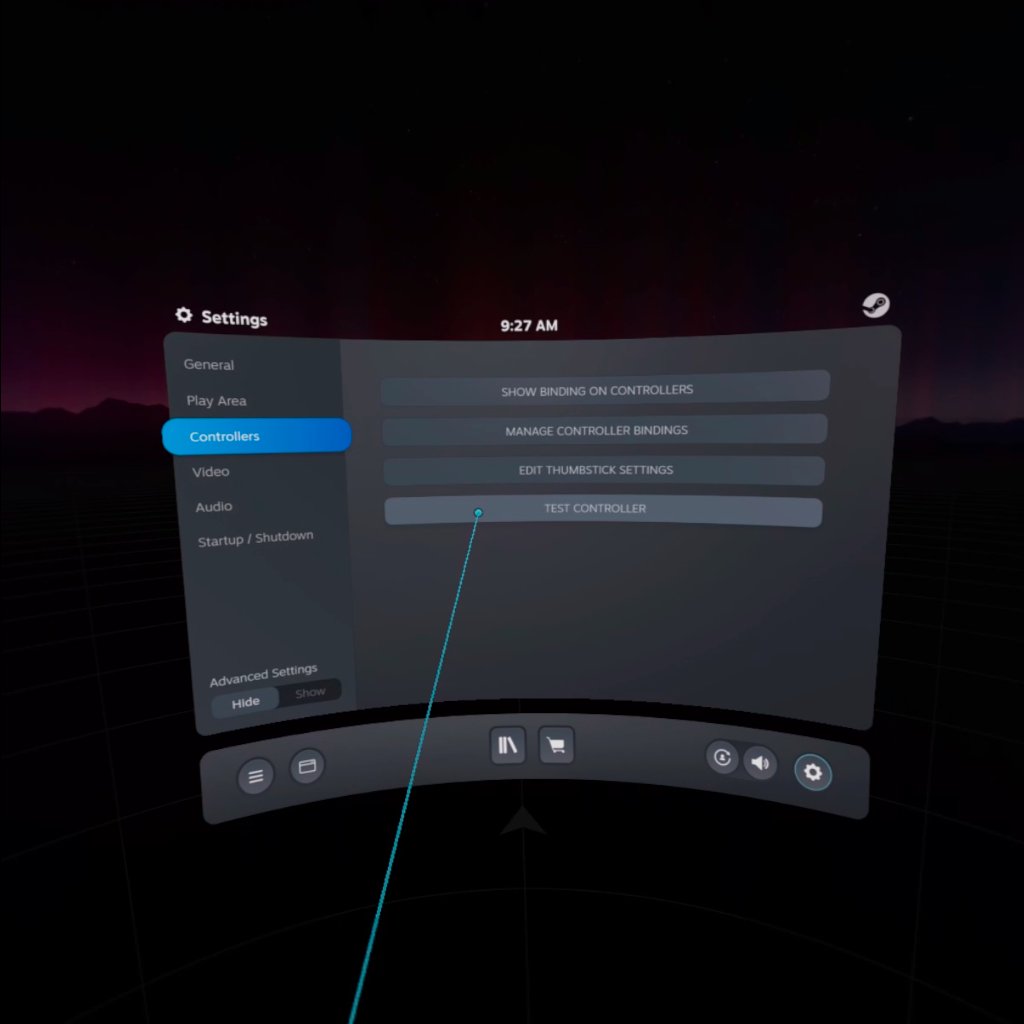
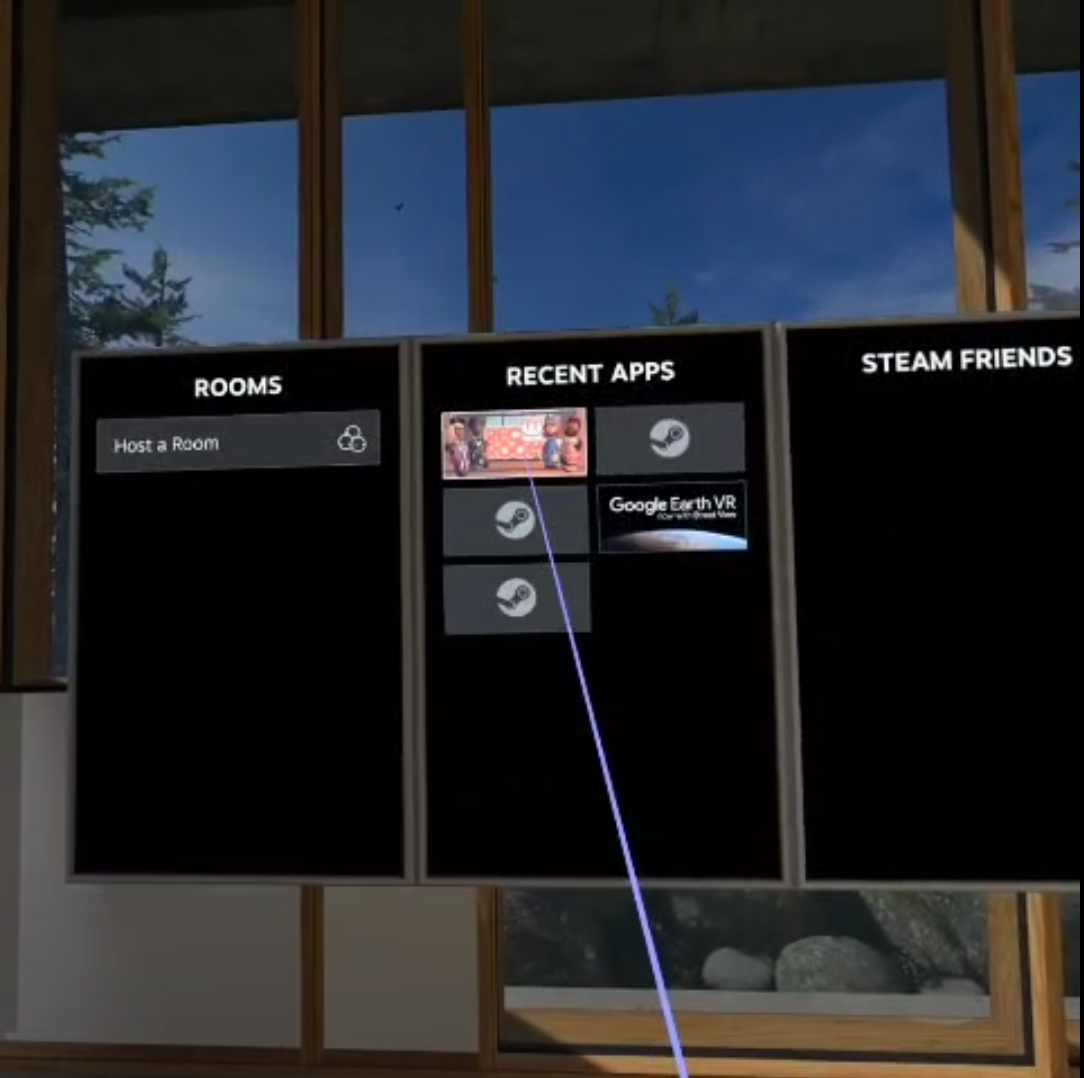
From the drop-down, select
treadmill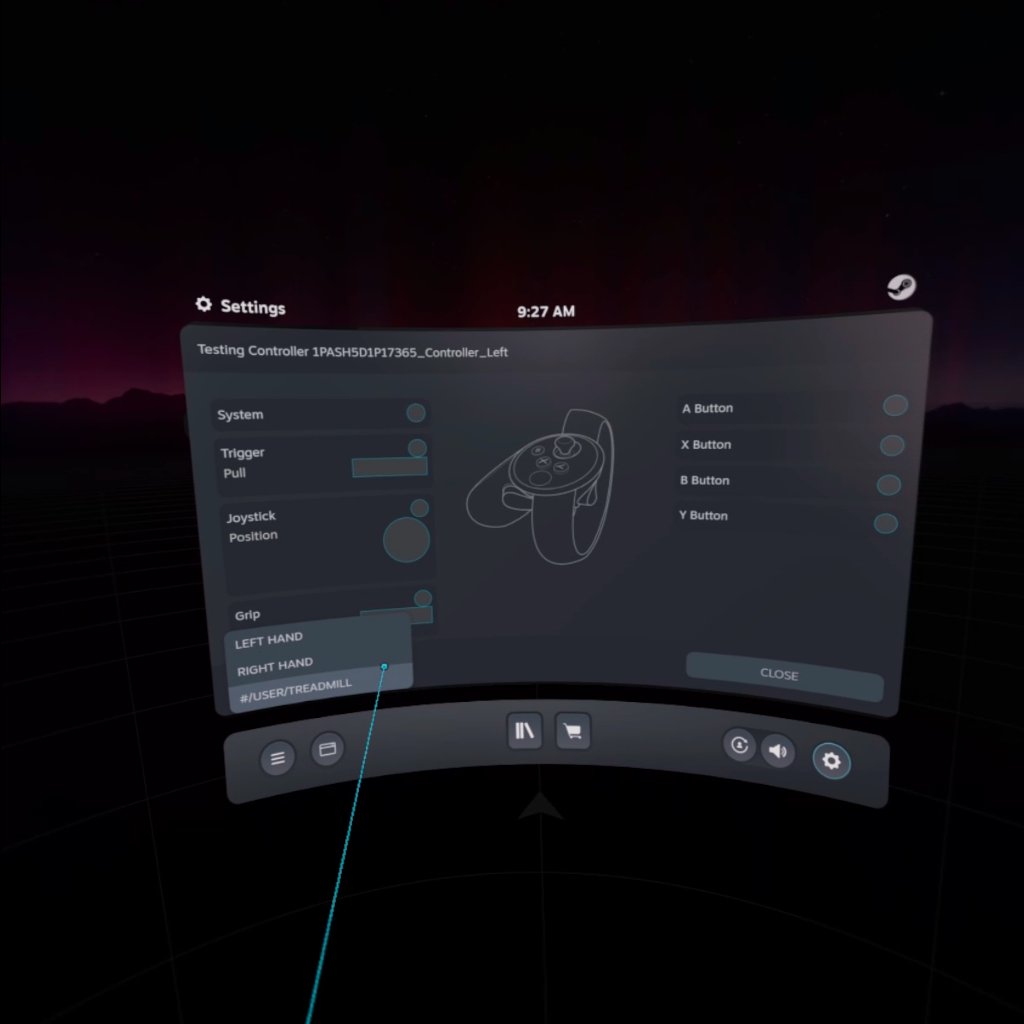
press
Won keyboard you should see joystick/trackpad positions move.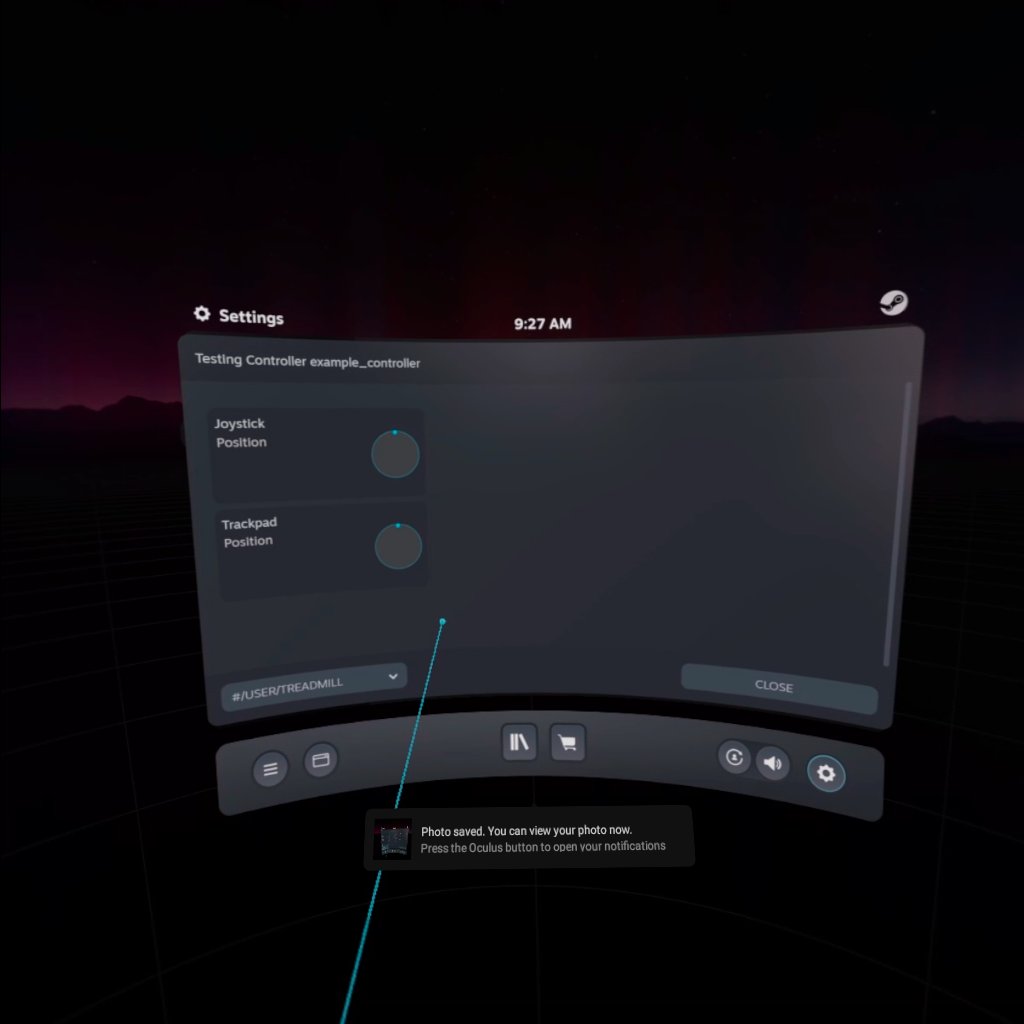
If things look correct, proceed to bindings.
Creating game bindings (SteamVR)
There are two methods to bind DreamWalker to games: automatic (pre-made bindings) and manual (user-created). Currently Rec Room and Pavlov have auto-bindings included; other games require manual bindings. (the auto bindings are added for every games in future)
Automatic game bindings
- If the game is supported by DreamWalker, open the game’s binding page in SteamVR and select the DreamWalker binding from the list. Save and launch the game.
Manual binding (step-by-step)
Use this for games that don’t have an auto binding (or for non-Steam games).
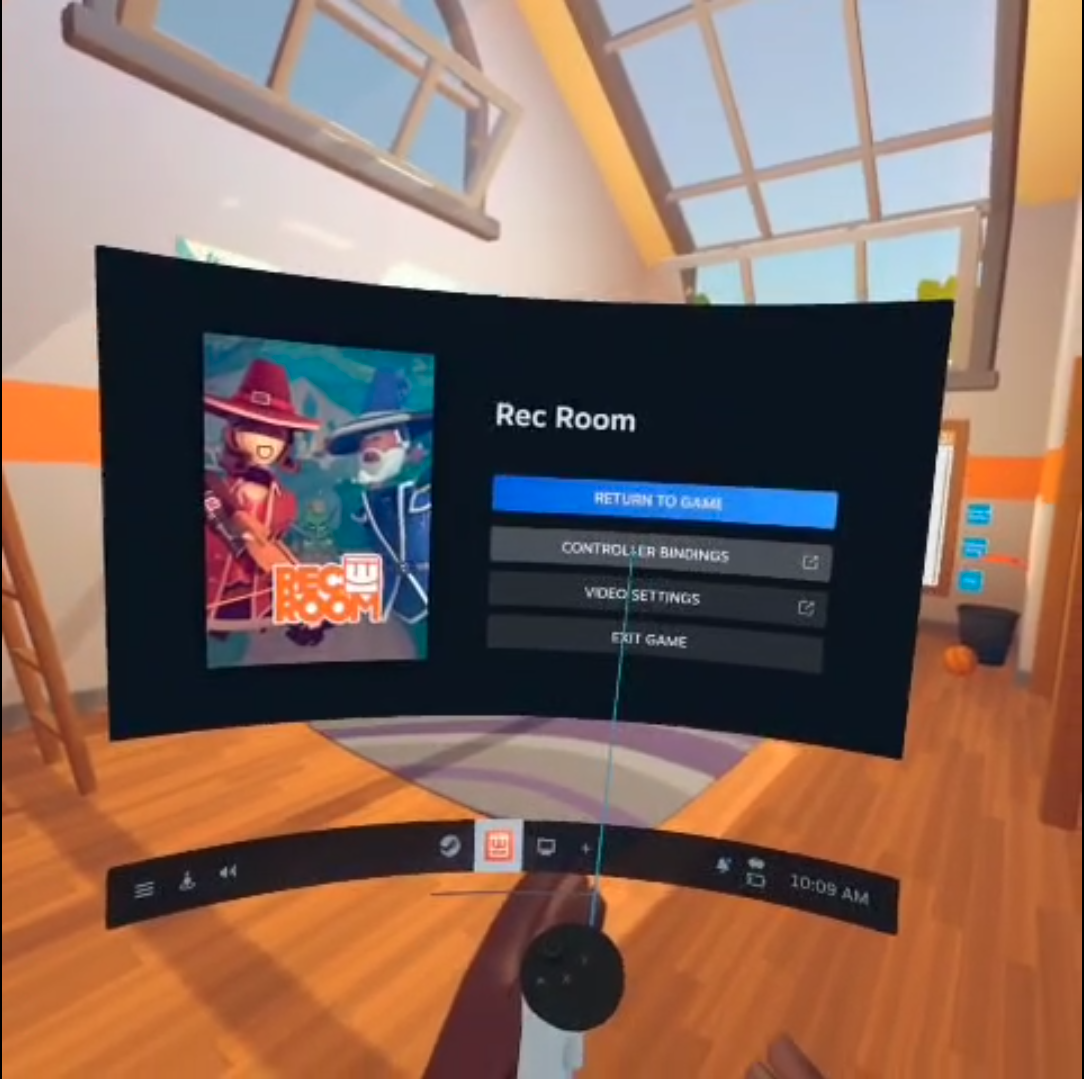
- Launch SteamVR and REC Room via Steam (or use the
Launchdropdown in SteamVR Input binding UI).
- In SteamVR, open Settings → Controller Bindings for the specific game, or hit menu button when inside the game to open controller bindings.
- choose Custom Controller and then Choose Another.
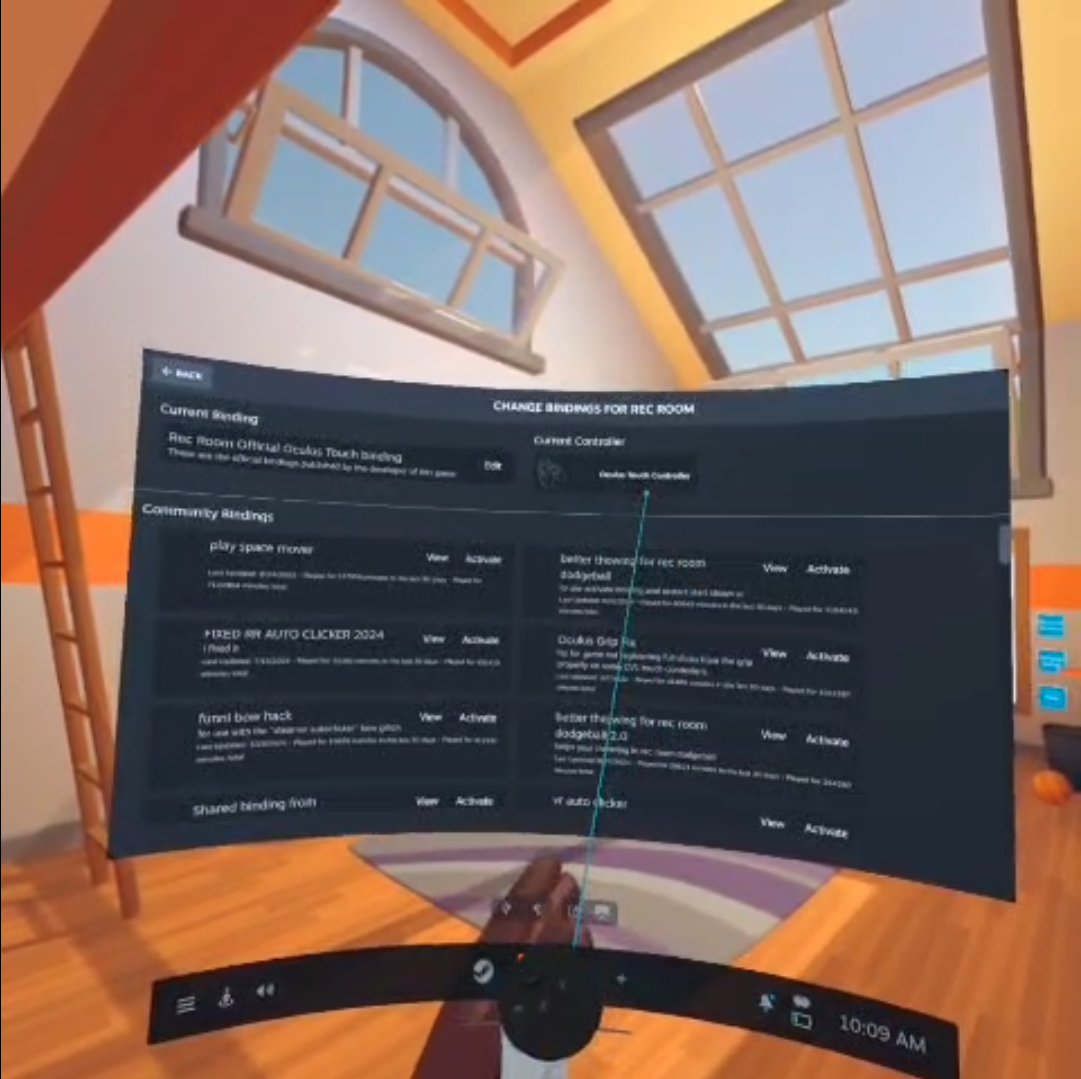
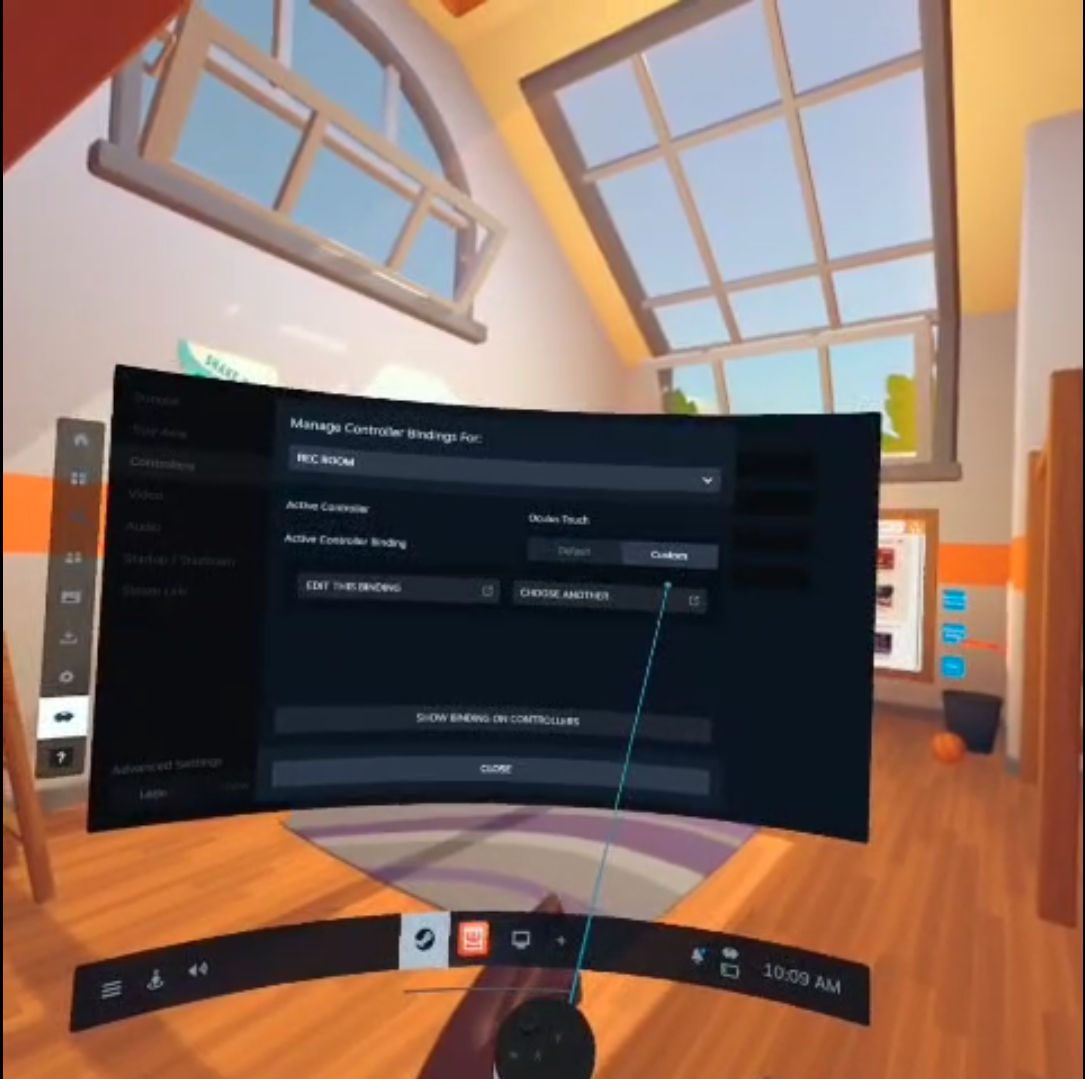
- click oculus touch controller. From the controller list, click the controller you want to replace which is dream walker
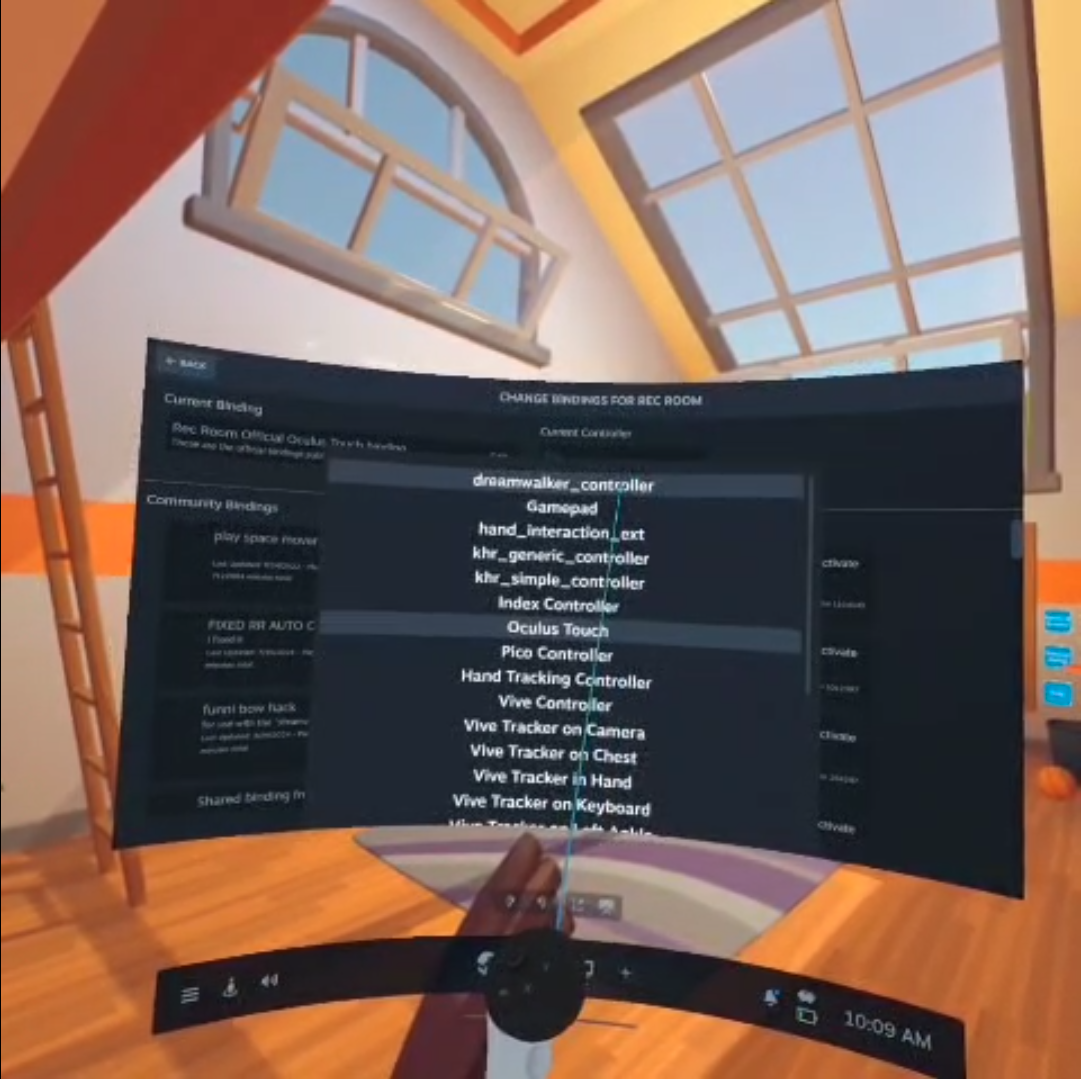
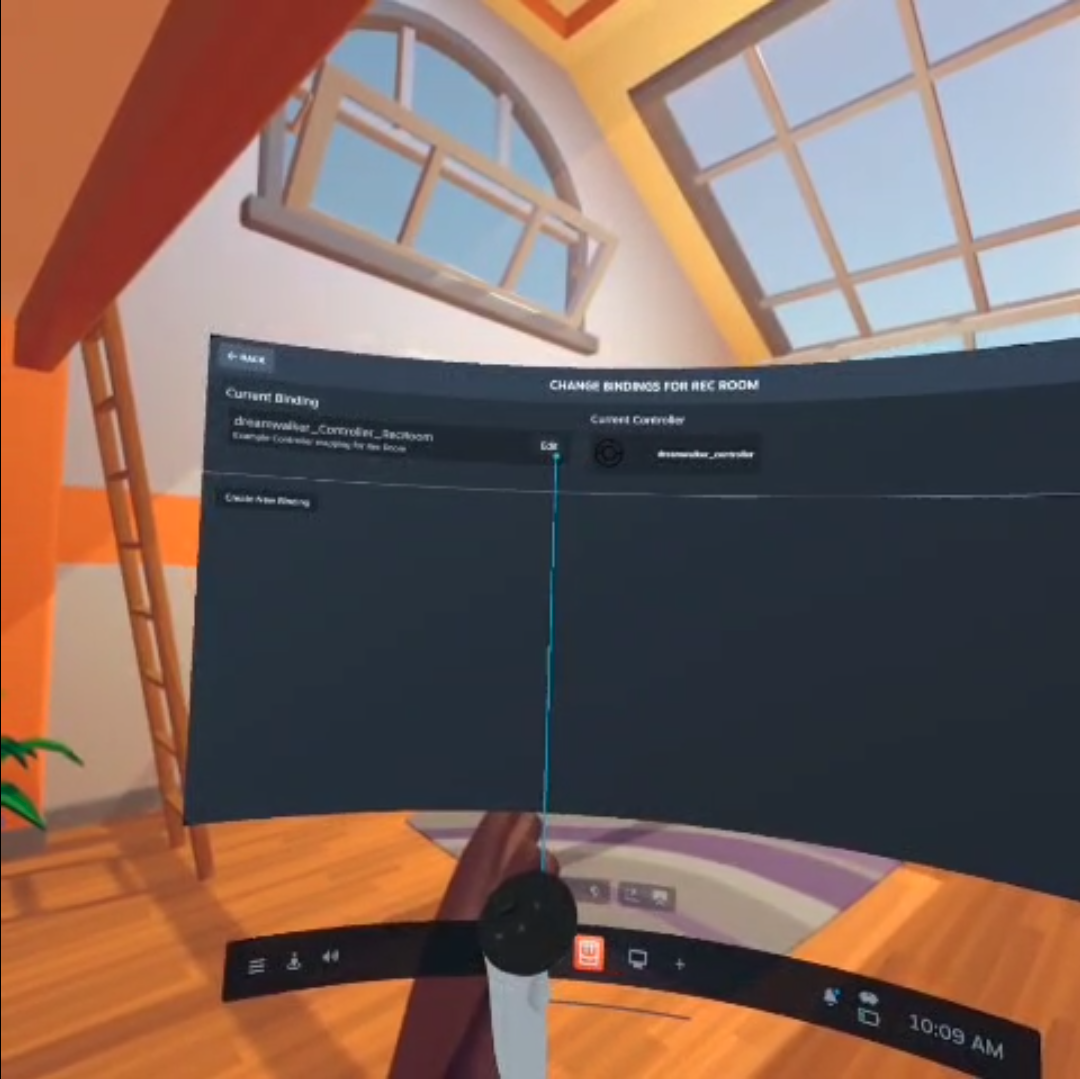
- If there is no current binding, create New Binding; otherwise, select Edit to modify existing.
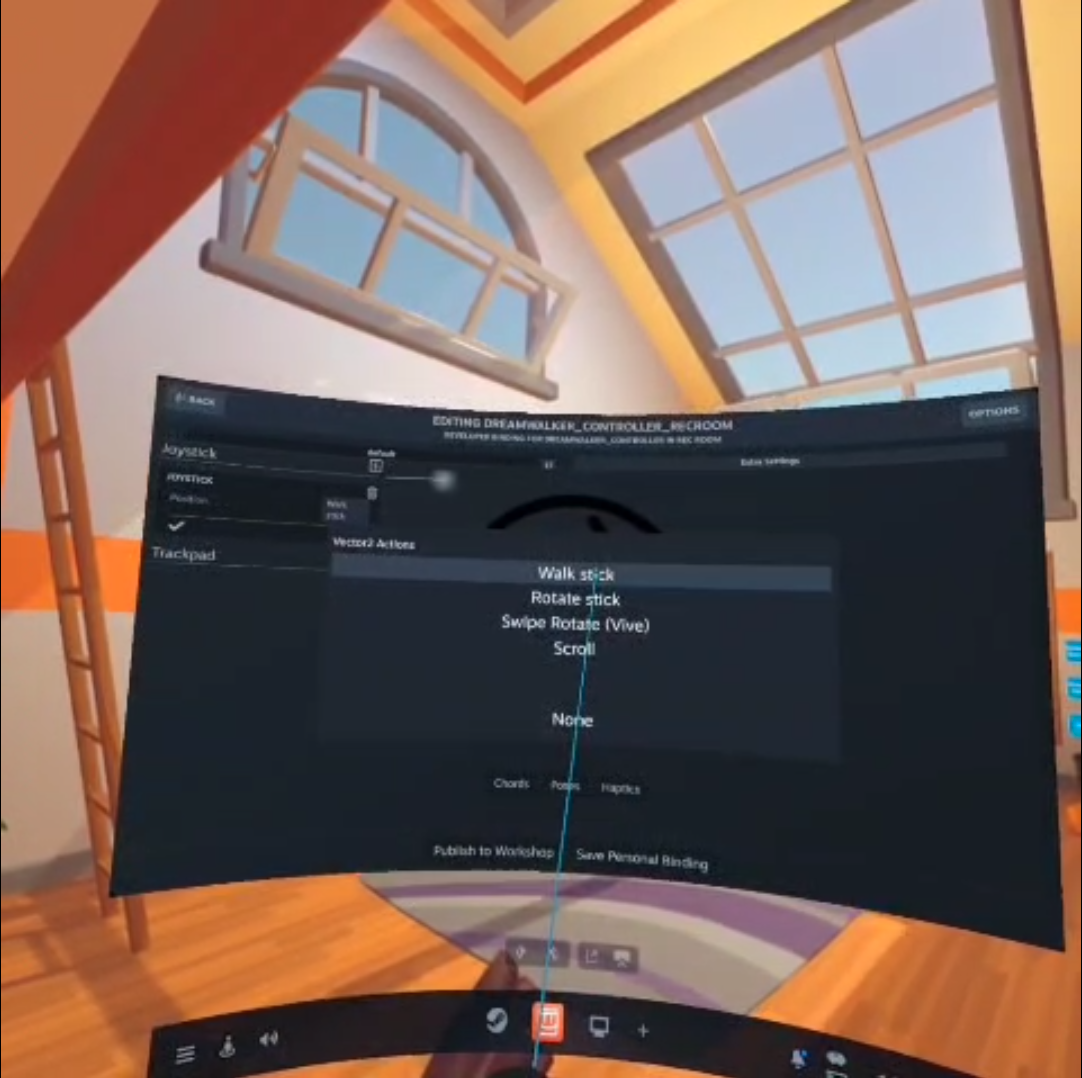
- In the Default section under the joystick mapping: set the joystick to use the DreamWalker joystick axis (map axis to
joystick/walk stickaction in your game).
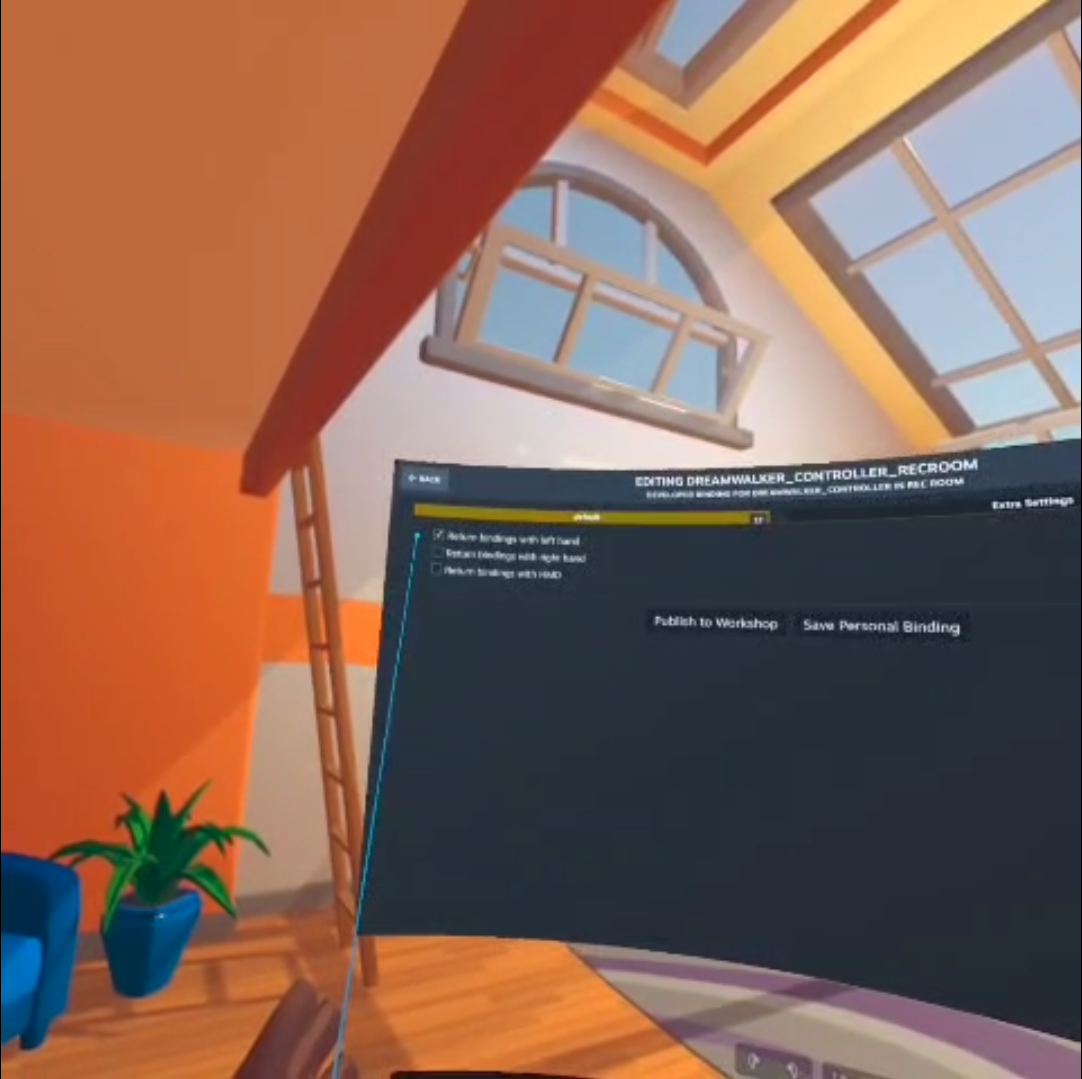
- In Extra Settings / advanced options, enable the Return binding with left hand option if your setup needs that (this ensures left-hand controls).
- Save the binding and test in-game.

Adjusting movement speed.
- There is a config.exe in this location
C:\Program Files (x86)\Steam\steamapps\common\SteamVR\drivers\dreamwalker\bin\win64 - This is used to adjust the speed of the walking based of the user preference.
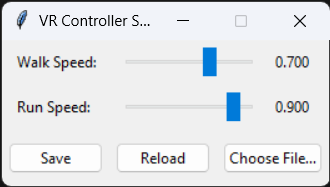
- By this user can decide how far they want to move for each physical step.
- Adjust the walking speed slider and hit save button to save the configuration.
- When in the middle of the game press
Ubutton to update the changes in real-time.
Programming the controller (ESP32-C3) — SOP
How to upload code prerequisite
Install PlatformIO (VSCode extension).
Import the project and ensure
platformio.inispecifies the correctboardenvironment.Edit the MAC constants in the relevant source file.
Upload.
1. Get MAC addresses
run the mac address code to get both receiver and the transmitter mac addresses.
2. Edit firmware configs
Open
boot_receiverand set the transmitter MAC address constant to the transmitter’s MAC you noted.Open
boot_transmitterand set the receiver MAC address constant to the receiver’s MAC.
3. Flash boot code
Flash the receiver firmware (
boot_receiver) to the receiver device.Flash the transmitter firmware (
boot_transmitter) to the transmitter device.Reboot both devices.
4. Pairing & test (Windows)
Turn on both devices.
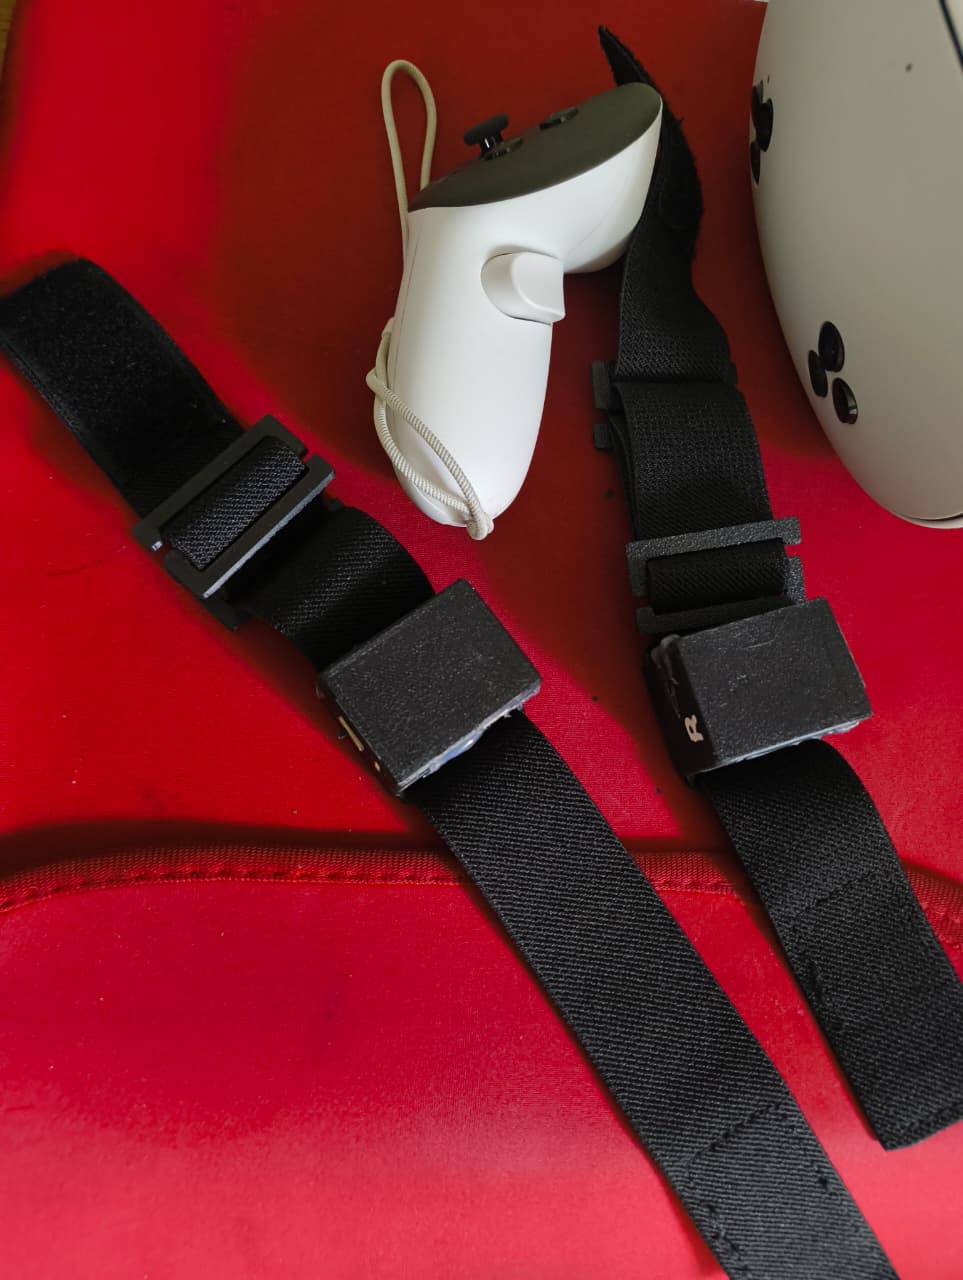
Open Windows Settings → Bluetooth & devices → Add device → select the DreamWalker device (it advertises as a keyboard HID).
Once paired, strap the receiver to your leg.
Open Notepad on the PC and walk in place — you should see the character
wprinted as you take steps.If
wappears reliably, proceed to SteamVR and verify driver-level behavior.
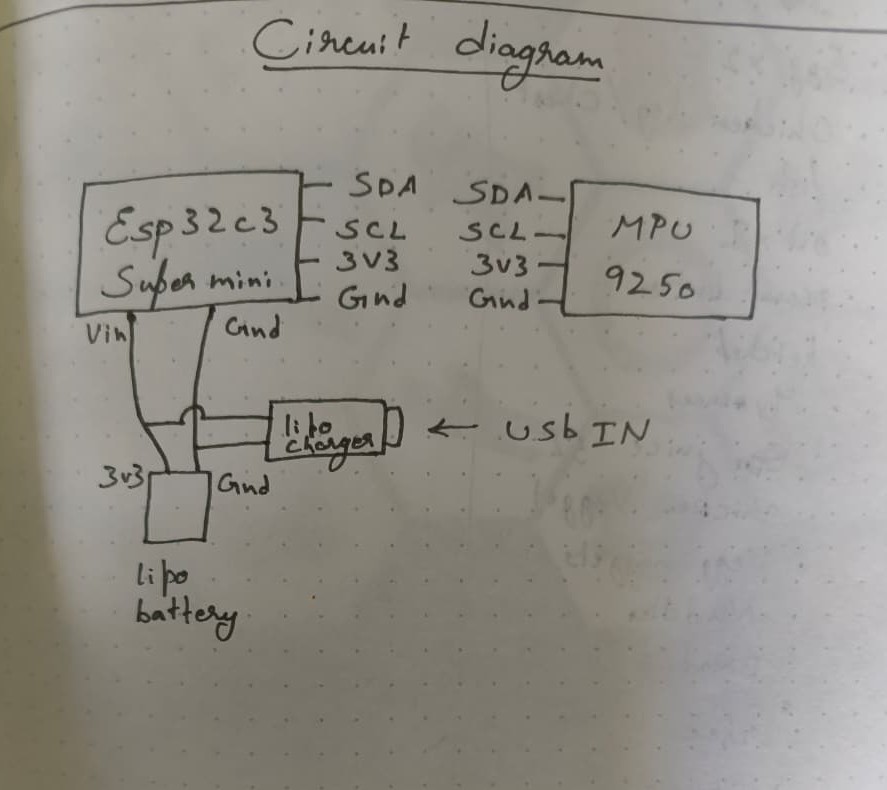
Circuit Connection diagram
Testing checklist (SOP)
Driver:
dreamwalkerfolder copied to SteamVRdriversdirectory.SteamVR restarted after copy.
SteamVR recognizes DreamWalker controller in Devices → Test Controllers.
Firmware:
Both ESP32 MACs recorded.
Firmware flashed with correct peer MACs.
Devices boot and connect over Bluetooth.
Input verification:
Notepad receives
wwhen stepping.SteamVR controller test shows joystick/trackpad axis movement when appropriate.
Game binding forwards inputs in-game (e.g., forward movement when stepping).
Final Note
If many people are interested in DreamWalker but don’t want the hassle of building one from scratch, I’d love to hear from you. I’m exploring a future commercial version of DreamWalker and your feedback will help me decide whether to produce a ready-to-buy unit. Please register your interest using the short form Here
License & contribution notes
This project is under MIT License.
The total cost of all components is approximately 50 CAD.
To reduce expenses, I leveraged a promotion on AliExpress that offers a 90% discount on first-time purchases, with that I was able to acquire the components for cheaper.
Gratitude and reference:
- This project is not possible without the steam vr driver tutorial by Finally Functional
- I also like to thank Petersen Blog for the inspiration.
- I also like to thank some of the other open-sourced VR hardware like Lucid Gloves and Slime VR
- This project is now possible without the edge impulse studio.
- All the source code are available in my github repo
- my LinkedIn profile : Akash Sivasubramanian